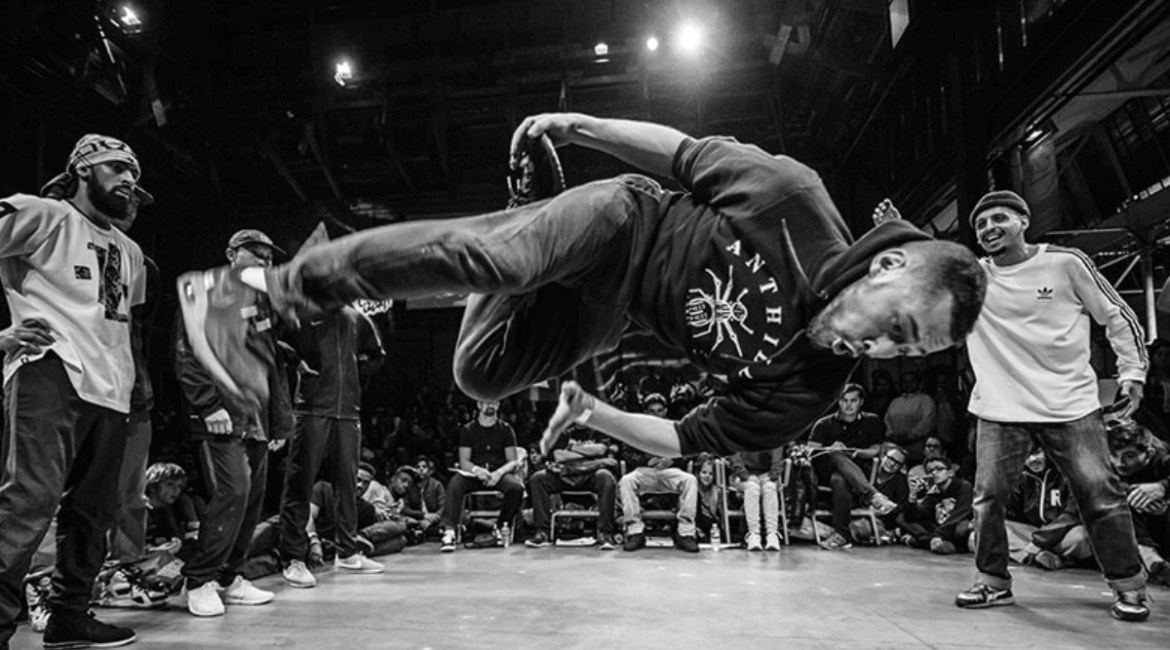
If you’ve ever dreamt of soaring through the air with flip that would make even superheroes jealous, you’re in the right place. Welcome to our beginner-friendly blog, where we’re going to spill the beans on everything you need to know about pulling off epic front flip.
Gymnastics is a major source of inspiration for breakdancing or breaking, which is why you’ll frequently see breakers somersaulting and flipping all over the stage when they perform.
What is breakdancing? Breakdancing is also known as breaking or b-boying/b-girling, is a dynamic and energetic form of street dance that emerged in the South Bronx of New York City during the early 1970s. It is one of the key elements of hip-hop culture, alongside graffiti art, DJing, and MCing (rapping). Breakdancing incorporates a variety of movements, including athletic and acrobatic maneuvers, freezes, spins, and stylish footwork.
Now, you might be thinking, “Flip sounsd awesome, but how do I even start?” Don’t worry – we’ve got your back! In this guide, we’re going to break down the basics in a way that’s as simple as counting to three. Whether you’re a total newbie or someone looking to brush up on their skills, we’re here to make flipping a breeze.
Let’s kick things off by saying that doing flips is like learning to ride a bike – it might seem a bit scary at first, but once you get the hang of it, it’s a whole lot of fun. We’ll talk about what goes on in your head (spoiler alert: confidence is key!) and how to tackle the mental side of flipping.
So, are you ready to dive headfirst into the world of front flips? Join us on this adventure as we break down each step, provide helpful tips, and celebrate your progress along the way. Get ready to flip, roll, and have a blast as you become a front flip master!
How to prepare for a front flip?
Learning gymnastic roll

- Stand Tall: Begin by standing up straight with your legs together. Reach for the stars – or at least as high as you can – by raising your arms straight above your head. Imagine your body forming a perfect straight line, from your fingertips to your toes. Stretch those arms and legs apart to the max!
- Lean into the Roll: Keep those knees as straight as possible and move your arms, head, and trunk down together. No bending at the waist – instead, maintain a straight line from your torso to your legs. As you lean into the roll, reach down towards the ground, connecting your hands with the floor in a smooth and controlled motion.
- Push Those Hips Forward: When your hands touch the floor, it’s hip-pushing time! Place your hands on the ground with fingers pointing ahead. Your upper body and hips should align, with your hips slightly elevated. Bring those hips forward, and make sure those legs stay straight. Keep it smooth – no flinging those legs over your body. To protect your neck, move your chin towards your chest.
- Roll onto Your Back: Keep those legs straight and gracefully flip over on your hands. Bend your arms slightly as you roll onto your back. Tuck your knees towards your chest for that extra finesse. You can even grab onto your shins or knees as you roll forward.
- Stand Up Like a Pro: As you finish the roll and find yourself on your back, it’s time to stand tall again. Roll flat onto your feet, and as soon as they hit the ground, lift those arms overhead and stand up confidently. You’ve just nailed the front roll – pat yourself on the back!
- Dive into the Next Level with Dive Rolls: Once you’ve aced the front roll, take it up a notch with dive rolls. It’s like a running start to a front roll. Run forward, jump from the balls of your feet, and keep those knees as straight as possible. As you jump, reach your arms forward towards the floor. When your hands touch the ground, smoothly transition into the front roll you’ve already mastered.
Practicing the elements of a flip

Step 1: Prep with Proper Stretches
- Begin with ankle stretches by sitting on the floor, rotating both feet in full circles in both directions. Feel the gentle stretch as you guide your feet with your hands.
- Moving on, let’s loosen up those hamstrings. Stand up and bring your left foot towards your buttocks, holding for about thirty seconds.
- Repeat the stretch with your right foot.
- Don’t forget to keep those muscles happy by rotating your wrists and neck several times – a little mobility warm-up!
Tip: Use your hands to assist with the foot rotations, and be kind to your neck. Move slowly, avoiding any directions that cause discomfort. Remember, stretching is your pre-flip ritual, so make it a habit before each practice session.
Step 2: Build Vertical Momentum with the “Punch Jump”
- Take a few running steps and then execute the “punch jump.”
- Imagine yourself punching the air as you jump straight up, reaching for the sky with your hands high and elbows by your ears.
- Land gracefully with your knees bent about 1 foot lower than your standing position, arms straight in front for that stylish finish.
Tip: You can straighten up and lift your arms after landing for an extra touch of flair!
Step 3: Perfect the “Pump Jump” with Tucked Knees
Elevate your skills by practicing the “pump jump” with your knees tucked towards your chest. This variation prepares you for the rotation phase of the front flip. Remember, practice makes perfect!
Step 4: Master Rotation on a Trampoline
- Take your newfound skills to a trampoline for added confidence.
- Begin with the “punch jump” and then tuck your knees as you rotate forward, landing with your knees bent before straightening up.
- Having a knowledgeable spotter nearby adds that extra layer of safety and support.
Tip: A spotter’s hand on or near your stomach can assist with the forward rotation. Safety first!
Step 5: Transition to a Gymnastics Block
- Perform your front flip off a gymnastics block facing a soft mat.
- This setup mimics the floor conditions more closely, requiring you to gather your own momentum for the flip.
A powerful “punch jump” ensures good momentum, so keep practicing this foundational move. The journey from the trampoline to the gymnastics block prepares you for the real deal – the floor flip!
Executing the Front Flip

Step 1: Do a front flip on the gym floor
Now that you’ve conquered the trampoline and gymnastics block, it’s time to take your front flip skills to the next level – the gym floor. This step involves combining the “punch jump” and rotations you’ve honed on the safer surfaces to execute a safe and effective front flip.
Step 2: On Your Marks, Get Set, Run Forward:
- Begin by running forward.
- Keep your body as straight as possible, maintaining an upright posture.
- Run with enough speed to generate the momentum needed for a high jump.
- As you approach the jump, raise your arms high above your head with your head held high, gearing up for the upcoming flip.
Step 3: The Pre-Jump Moment:
Before diving into the flip, initiate a pre-jump.
- This involves a small jump with your arms still lifted overhead and your legs closed.
- Keep your gaze forward, ensuring your head stays straight without bending.
This precaution is vital to maintain a straight back, preventing any disruptions in your flip. Remember to keep your abs engaged during this phase.
Step 4: Soar to New Heights:
- Execute a powerful jump from the balls of your feet, extending your arms overhead without bending your knees.
- The objective is to reach maximum height, setting the stage for a seamless flip.
- Avoid bending your knees or leaning forward at the wrong time, as it can impact the success of your front flip.
Step 5: Tuck and Roll:
- Once airborne, tuck your knees towards your chest, forming a compact ball shape.
- Simultaneously, grab your shins as you initiate the rotation for the forward flip.
This tucked position is crucial for achieving a controlled and graceful rotation.
Step 6: Release and Stabilize:
- As you feel your body complete the rotation, release your grip on your shins.
- It’s important not to hold onto your shins for an extended period, as this could lead to unintentional additional flips, potentially disrupting the landing.
Step 7: Stick the Landing
- As you complete the flip rotation, extend your legs downward, preparing for a firm landing on your feet.
- Strive to achieve a stuck position, where you land without bouncing or requiring an extra step.
- Bend your knees slightly upon landing, aiming to maintain a straight body posture.
It’s essential to note that a front flip entails a blind landing – you won’t see the floor before your feet touch it. Trust in your training, keep your knees bent, and your body straight for a confident and secure landing.
By following these steps and practicing consistently, you’ll soon be impressing everyone with your flawless front flips on the gym floor. Keep flipping and enjoy the thrill of your newfound skill! And after mastering this basic pattern of front flip, you should learn more cool flips through this YOUTUBE video below!


Leave a reply