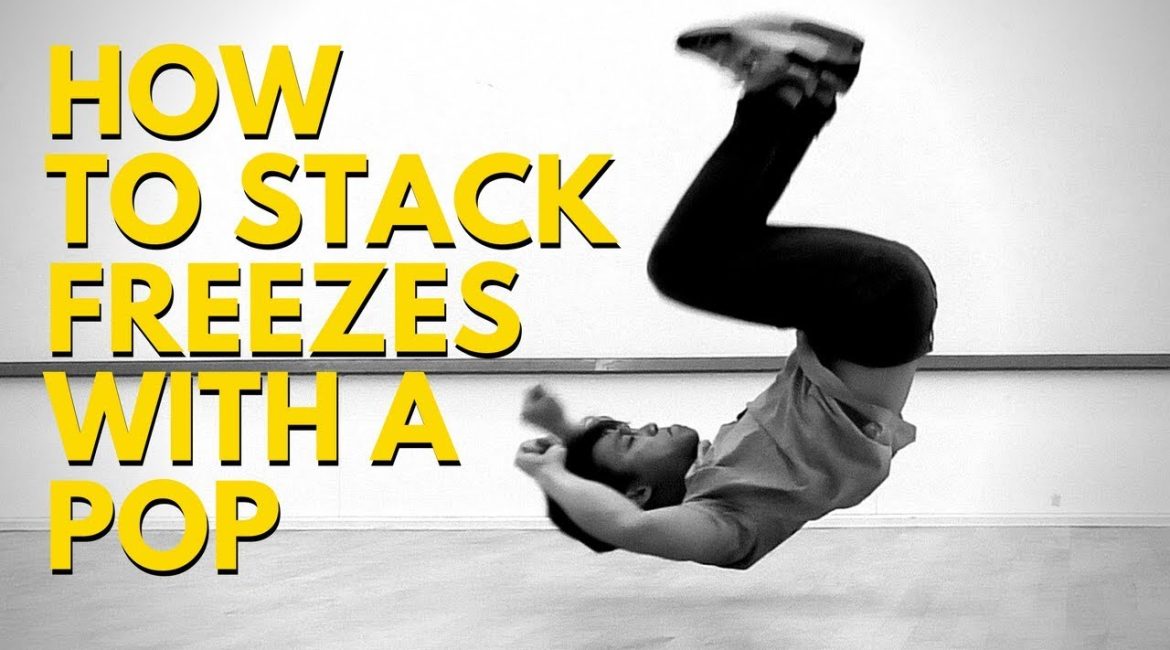
I’ve seen many dancers struggle with efficient freeze transitions. One of the most common issues I’ve noticed is the tendency to use wild, kicking motions when changing from one freeze to another. While this might look flashy to beginners, it’s actually an inefficient and often sloppy technique that can hinder your progress and style.
In this blog post, we’re going to dive deep into a more correct and efficient method of transitioning between freezes: the pop technique. This method not only looks cleaner but also allows for smoother, more controlled movements, ultimately elevating your breaking game.
Understanding the Problem: Wild Kicking vs. Efficient Popping
Before we delve into the proper technique, let’s first understand why the common “wild kicking” method is problematic:
The Issue with Wild Kicking
- Lack of Control: Wild kicking motions often lead to unpredictable landings, making it difficult to hit your freezes consistently.
- Energy Inefficiency: Excessive movement wastes energy that could be better used for maintaining freezes or executing other moves.
- Aesthetic Concerns: From a visual standpoint, wild kicking can look messy and unrefined, detracting from the overall impact of your performance.
- Limited Transition Options: Relying on kicking motions limits the variety of transitions you can execute smoothly.
The Benefits of Proper Popping
- Increased Control: The pop technique allows for more precise movements, improving your ability to hit and hold freezes.
- Energy Conservation: By minimizing unnecessary movement, you conserve energy for longer sets and more complex combinations.
- Cleaner Aesthetics: Popping creates a crisp, clean look that enhances the visual appeal of your freeze transitions.
- Versatility: Once mastered, the pop technique can be applied to various freeze transitions, expanding your repertoire.
The Fundamentals of the Pop Technique
Now that we understand why the pop technique is superior, let’s break down the fundamentals of this method.
Core Principles
- Controlled Explosion: The pop is essentially a small, controlled explosion of movement, using your core and leg muscles.
- Compact Motion: Unlike wild kicking, the pop keeps your body compact, with movements close to your center of gravity.
- Knee-to-Chest Action: The key to an effective pop is bringing your knees to your chest, not your chest to your knees.
- Timing and Rhythm: The pop should be quick and precise, timed with the beat of the music for maximum effect.
Learning the Pop Technique: Step-by-Step Guide
Let’s start with a basic example: popping from a back freeze position. This fundamental movement will form the basis for more complex freeze transitions.
Step 1: Proper Back Freeze Position
- Start in a solid back freeze position.
- Ensure your core is engaged and your body is balanced.
Step 2: Initiate the Pop
- Quickly bring your knees towards your chest.
- Keep your movement compact and controlled.
Step 3: Extend and Lift
- As your knees reach your chest, explosively extend your legs.
- This extension should create enough force to lift your body slightly off the ground.
Step 4: Control the Landing
- As you come back down, immediately return to your initial freeze position or transition to a new one.
- Maintain body control throughout the movement.
Common Mistakes and How to Avoid Them
As with any breaking technique, there are common pitfalls to watch out for when learning the pop technique:
- Chest to Knees: Many beginners make the mistake of bringing their chest to their knees instead of their knees to their chest. This reduces the power of the pop and limits your ability to transition smoothly. Solution: Focus on keeping your upper body relatively stable and bringing your knees up towards your chest.
- Overextension: Extending your legs too far can throw off your balance and make it difficult to control your landing. Solution: Practice controlling the extent of your leg extension. Start with smaller pops and gradually increase the power as you gain more control.
- Lack of Core Engagement: The pop technique relies heavily on core strength. Without proper core engagement, your movements will lack power and control. Solution: Incorporate core strengthening exercises into your training routine. Practice engaging your core during all aspects of your breaking, not just during freezes.
- Inconsistent Timing: Popping off-beat or with inconsistent timing can make your transitions look sloppy. Solution: Practice your pops to music. Start with slower beats and gradually increase the tempo as you become more comfortable with the technique.
Applying the Pop Technique to Different Freezes
Once you’ve mastered the basic pop from a back freeze, you can apply this technique to various other freezes and transitions. Here are a few examples:
Turtle Freeze to Handstand
- Start in a turtle freeze position.
- Use the pop technique to explosively lift your hips and legs.
- As your legs rise, shift your weight onto your hands and extend into a handstand.
Chair Freeze to Elbow Freeze
- Begin in a solid chair freeze.
- Pop your hips up while simultaneously shifting your weight to one arm.
- As you land, transition smoothly into an elbow freeze.
Hollowback to Baby Freeze
- Start in a hollowback position.
- Use the pop to lift your legs and hips.
- As you come down, twist your body and land in a baby freeze position.
Remember, the key to successful application across different freezes is maintaining the core principles of the pop technique: controlled explosion, compact motion, and proper knee-to-chest action.
Incorporating Pops into Your Freestyle
Mastering the pop technique in isolation is just the first step. The real challenge lies in seamlessly incorporating these movements into your freestyle breaking. Here are some tips to help you integrate pops into your routines:
- Start Simple: Begin by incorporating basic pops between two freezes you’re comfortable with. As you gain confidence, gradually increase the complexity of your transitions.
- Practice to Music: Always practice your pops and transitions to music. This will help you develop a natural rhythm and timing for your movements.
- Create Combinations: Develop short combinations of freezes connected by pops. Practice these combinations until they become second nature.
- Mix with Other Techniques: While pops are efficient, they shouldn’t be your only transition technique. Mix them with other methods to keep your style diverse and unpredictable.
- Focus on Flow: The goal is to make your transitions look effortless. Focus on creating a smooth flow between your freezes, using the pop technique to enhance rather than interrupt your movement.
Advanced Pop Techniques
As you become more comfortable with basic pops, you can start exploring more advanced techniques:
Double Pops
Execute two quick pops in succession, allowing for more complex transitions or added flair to your freezes.
Delayed Pops
Introduce a slight delay between initiating the pop and the actual lift-off, creating a suspenseful effect.
Directional Pops
Use the pop technique to propel your body in specific directions, opening up new transition possibilities.
Pop and Twist
Combine the pop with a twisting motion to change your orientation mid-air.
Training Regimen for Mastering the Pop Technique
Developing a strong and consistent pop requires dedicated practice. Here’s a suggested training regimen to help you master this technique:
- Warm-up (10-15 minutes):
- Dynamic stretching
- Light cardio to get your blood flowing
- Core Strengthening (10-15 minutes):
- Planks
- Hollow body holds
- V-ups
- Basic Pop Practice (20-30 minutes):
- Practice pops from various freeze positions
- Focus on form and control
- Transition Drills (20-30 minutes):
- Practice transitioning between different freezes using the pop technique
- Start with simple transitions and progressively increase difficulty
- Freestyle Integration (15-20 minutes):
- Incorporate pop transitions into your freestyle routines
- Focus on smoothness and musicality
- Cool Down (10-15 minutes):
- Static stretching
- Reflect on your progress and areas for improvement
Aim to practice this regimen 3-4 times a week, adjusting the durations and exercises as needed based on your skill level and goals.
Conclusion
Mastering the pop technique for bboy freeze stacks is a game-changer in your breaking journey. It not only enhances the visual appeal of your freezes but also improves your overall control, efficiency, and versatility as a breaker.
Remember, like any skill in breaking, perfecting the pop technique takes time, patience, and consistent practice. Don’t get discouraged if you don’t see immediate results. Keep working at it, and you’ll gradually see improvements in your freeze transitions and overall flow.
As you continue to develop your popping technique, don’t be afraid to experiment and find ways to make it your own. Breaking is all about individual style and creativity, so use this technique as a foundation to build your unique flavor.
Lastly, always keep in mind that techniques like this are tools to enhance your breaking, not define it. The pop technique should complement your style, not restrict it. Stay true to your artistic vision, keep pushing your boundaries, and most importantly, enjoy the process of growing as a bboy.
Now it’s time to hit the practice space and start popping! Remember, every world-class bboy started somewhere, and with dedication and the right techniques, you’re on your way to taking your breaking to the next level. Keep breaking, keep innovating, and keep pushing the boundaries of what’s possible in this incredible dance form.


Leave a reply