Welcome to our blog, where we’re going to talk about the exciting journey into the world of handstand push-ups for this time! If you’ve ever wondered how to master this challenging yet rewarding exercise, you’re in the right place.
Today, we’re going to break down the steps for you in a simple and easy-to-follow manner, so that even if you’ve never attempted a handstand before, you’ll feel confident giving it a try. So, roll out your yoga mat or find a soft spot on the floor, and let’s dive into the steps to achieve the elusive handstand push-ups!
Things you should know about handstand push-ups
Definition
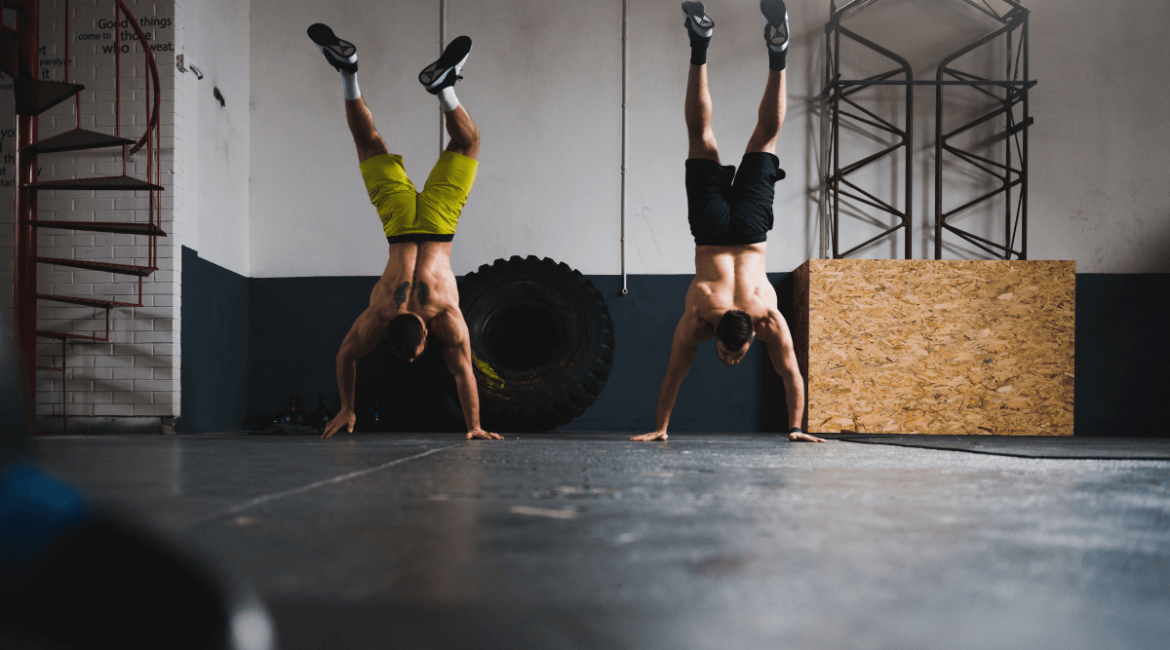
What are handstand push-ups? The handstand push-ups are like the big, tough sibling of the regular push-ups. While the regular push-ups are great for working out your muscles, the handstand push-ups take things up a notch, especially when it comes to your shoulders.
When you’re doing regular push-ups, you do work your shoulders a bit, but if you really want to focus on them and make them stronger, you need to do what’s called “vertical pressing.” This means pushing upward instead of just pushing your body weight off the ground. It’s easy to do this in a gym where you have weights to lift overhead, but if you’re working out at home, it’s a bit trickier. Actually, it’s a lot trickier.
- To do vertical pressing without weights, you have to get creative.
- You need to go upside down, like doing a headstand, and then push yourself up until you’re in a handstand position.
- Then, slowly lower yourself back down.
- It’s like you’re trying to push the ground away from you, even though it’s not going anywhere.
This exercise really works your shoulders, and it also helps you build strength and control throughout your whole body as you work to stay balanced and upright.
Benefits of handstand push-ups
Handstand push-ups, also known as HSPUs, are calisthenics moves for building strength in your upper body.
- When you do handstand push-ups, you’re mainly working out your deltoids, which are the muscles in your shoulders, as well as your triceps.
- You’re also getting your pecs, traps, lats, and lots of other muscles in your core and upper body involved.
- They all pitch in to help keep you steady and balanced while you’re upside down, which is definitely not a position your body is used to!
But handstand push-ups aren’t just about getting big, strong shoulders. They’re also about improving your balance, coordination, and something called proprioception, which is basically your body’s ability to know where it is in space.
So, while it might not be a big surprise, handstand push-ups are a total package deal when it comes to working out your upper body and improving your overall fitness.
Are handstand push-ups better than regular push-ups?
While handstand push-ups definitely up the ante in terms of difficulty, they’re not necessarily superior to regular push-ups – they’re just different.

Regular push-ups focus more on working out your chest muscles and put less strain on your shoulders, which makes them great for doing lots of reps to pump up your pecs. Plus, because they’re less intense, you can do them more often without needing as much time to recover. That means you could do regular push-ups almost every day if you wanted to.
On the other hand, handstand push-ups might need more downtime between sessions.
Both types of push-ups are awesome exercises, and they each bring something special to your bodyweight workout routine. So, even after you’ve mastered handstand push-ups, don’t toss regular push-ups aside like they’re just for beginners. They deserve their own spotlight in your training plan!
5 Step guide to do handstand push-ups
Venturing into the upside-down world of handstand push-ups might seem scary at first, but once you’ve mastered it, you’ll have a powerful workout move in your arsenal. Imagine being able to work on those shoulder muscles wherever you are, whether you’re at home or staying in a hotel. With just your body weight, you can transform your workouts and sculpt your shoulders to be as strong as the Death Star.
If you’re feeling unsure about where to begin, don’t fret! We’ve got a simple five-step plan to guide you through the process. Stick to these steps, and before you know it, you’ll be confidently flipping upside down and pushing yourself to new heights.
Step 1: Push-ups
If you’re ready to take your workout to new heights, start with the basics – the floor is your best friend. Regular old push-ups are the perfect starting point for building up the strength and stability in your shoulders, as well as the flexibility in your triceps, which you’ll definitely need for more advanced moves. Let’s break it down:
Form Check
- Get into a strong plank position, making sure your core is engaged and your hands are flat on the ground directly under your shoulders.
- Slowly lower your chest towards the ground by bending your elbows.
- Keep your elbows at a 45-degree angle and make sure they don’t stick out to the sides.
- Then, push explosively back up until your arms are fully extended. Repeat this motion.
The Plan
Try to incorporate regular push-ups into your routine as often as possible – daily workouts are ideal if you can manage them. Aim to do 20-30 reps with perfect form before moving on to more challenging exercises. But don’t forget about push-ups altogether – they’re a fundamental exercise that you can keep doing for life.
Step 2: Pike push-ups
With just a few simple adjustments to our regular push-up routine, we can start targeting our shoulders more effectively. One way to do this is by trying out pike push-ups on the ground, which we’ll explain below. But don’t hesitate to challenge yourself even further by attempting these with your feet elevated on a box or bench. Here’s how to do it:
Form Check
- Start in a strong push-up position with your hands about shoulder-width apart.
- If you can, elevate your feet using a box or bench.
- Then, walk your hands backward towards your feet until your hips are almost directly above your shoulders.
- Slowly lower your head towards the ground by bending your elbows.
- Pause for a moment when your nose touches the ground, and then push back up explosively.
The Plan
Once you feel comfortable with the movement, try doing your reps with your feet elevated on a box or bench. Aim to do 10-15 reps with perfect form before moving on to the next exercise. But don’t forget to keep pike push-ups in your workout routine even as you progress – they’re great for targeting your deltoids until you’re ready to tackle full handstand push-ups.
Step 3: Wall walks

Let’s take the first steps toward getting comfortable with being upside down – it’s a journey we’ll take inch by inch. Wall walks are a fantastic way to not only strengthen your shoulders but also to gradually introduce yourself to being upside down, all at your own pace.
Form Check
- Start in a strong push-up position with your feet touching a wall behind you.
- Begin to move your feet up the wall, one step at a time, while simultaneously walking your hands backward.
- Keep going until you’re fully inverted, either flat against the wall or with your hands as close to it as possible.
- Slowly and with control, reverse the movement, walking your hands forward and your feet down until you’re back in your push-up position.
The Plan
Continue incorporating pike push-ups into your routine to ensure you’re giving your shoulders a thorough workout. At the same time, focus on using wall walks to gradually increase your comfort and confidence in the upside-down position. Once you’re able to get your chest flat against the wall and back down a few times in a row, start adding in some holds to really challenge yourself.
Step 4: Handstand holds
Congratulations! You’ve reached the final stage of this journey before we dive into attempting our very first reps. If you’ve mastered wall walks and feel confident enough to walk right up to vertical and start your hold there, go ahead and give it a shot. But if you’re not quite there yet, don’t worry – we’ve got another option that’s a little easier: kicking up, over, and facing away from the wall.
Form Check
- Lean forward and place your hands flat on the ground, a little wider than shoulder-width apart, and about 6-8 inches away from a wall.
- Shift your weight forward and kick both legs explosively over your head, rolling forward until your feet touch the wall.
- Straighten your legs out, and tighten your glutes and thighs to create tension throughout your entire body.
- Focus on actively pushing the ground away from you, and hold this position with tension, almost like you’re doing an ‘inverted plank’.
The Plan
Try to spend as much time as possible in this position, aiming for a consistent 60-second hold and beyond. There’s no set formula for progressing here – just focus on getting more and more comfortable in this position while also building strength in your shoulders and improving your coordination. Once you can comfortably hold yourself upside down for at least a minute, it’s time to start moving onto the next step…
Step 5: Handstand push-ups to blocks

Welcome to the final stage of your journey to mastering the handstand push-up. Here, we’ll gradually increase your range of motion, taking you step by step toward mastery.
Form Check
- Start by kicking up into a handstand hold, using a stack of books, weight plates, or yoga blocks beneath your head for support.
- Slowly bend your elbows, lowering your head towards the blocks.
- Once you make contact, take a breath, and then push explosively back up until your arms are fully extended.
- Repeat this movement.
The Plan
Begin with your blocks stacked high enough that you only need to lower a few inches to make contact. Slowly remove the blocks one by one until you reach a height where you can no longer perform 5 reps. Spend some time at this height, aiming to do 8-10 reps before reducing the height again. Keep repeating this process, gradually lowering the height until you’re able to perform the handstand push-up with your hands directly on the ground. This might take several sessions, but don’t rush it – each step brings you closer to unlocking the full handstand push-up.
Congratulations! You’ve just unlocked the handstand push-up. Now, keep up the good work – those shoulders won’t strengthen themselves. If you need a more detailed guide, check out this YOUTUBE video!
Leave a reply