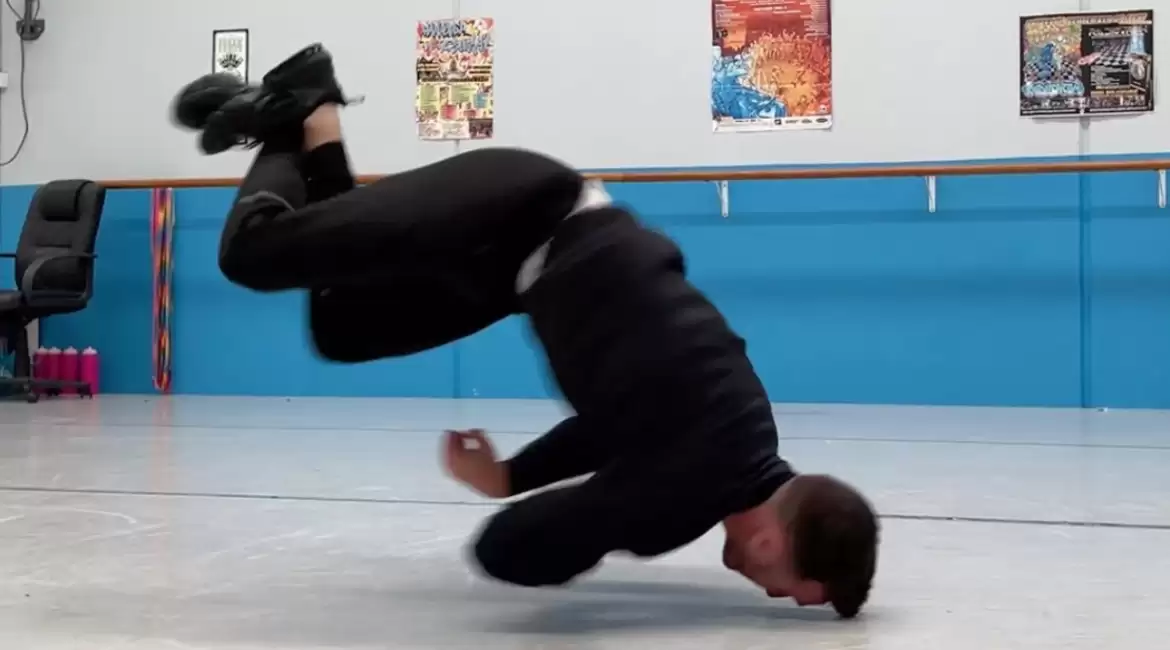
Breakdancing is full of impressive moves, and the baby windmill stands out as a dynamic and challenging variation of the classic windmill. This move not only showcases a dancer’s agility and control but also adds flair to any routine.
Mastering the baby windmills build essential strength and coordination, paving the way for other advanced techniques. This guide will take you step-by-step through learning the baby windmill, from essential prerequisites to perfecting the move. Whether you’re a beginner or an experienced dancer, this tutorial will help you perform baby windmills with confidence and style.
What are Baby Windmills?
Technically, there’s no significant difference between standard windmills and their baby variant. They are essentially a variation of the original windmill move, so if you’re already familiar with how to perform windmills, you won’t need to start learning from scratch.
To begin with, the basic windmill can be executed either by “stabbing” or without “stabbing.” Many beginners start with the stabbed version because it provides more control and stability. However, as you progress and aim to perform multiple rotations consecutively, stabbing can become a hindrance, slowing down your movements. For this reason, transitioning to the unstabbed version is beneficial when you want to elevate your windmill skills to the next level.

The History of Baby Windmills
The exact origins of the baby windmill are somewhat mysterious, as no one knows precisely where or when this variant first appeared. However, it is highly likely that baby windmills emerged around the same time as the original windmill move.
Unlike many other breakdancing moves that were discovered through experimentation, the windmill was invented quite by accident. The story goes that Crazy Legs of the famous Rock Steady Crew unintentionally created the windmill while practicing in the Bronx, New York. As the tale is told, Crazy Legs overshot his chair freeze and found himself in a continuous backspin. This unexpected movement quickly gained popularity, inspired by the dynamic kung fu kicks seen in Bruce Lee’s movies.
The windmill’s accidental invention sparked a power move revolution that significantly influenced the world of breakdancing. The move became a cornerstone of the dance form, with countless instructors recommending it as an essential foundation for aspiring breakdancers. Mastering the windmill is considered crucial not only because it is an impressive move on its own but also because it serves as a launchpad for numerous other power moves.
In essence, if you aim to excel in the art of power flow in breakdancing, mastering the fundamentals of the windmill is indispensable. The same principle applies to learning baby windmills, as they are a natural progression from the original move. By honing your windmill skills, you lay a strong foundation for achieving proficiency in baby windmills and other advanced power moves.

How to Do Baby Windmills for Beginners
Before diving into this windmill variant, it’s strongly recommended that you first master the basics of breakdancing. This means learning the top breakdance moves and essential footwork techniques to build a solid foundation.
Once you’re confident with standard windmills, you can start experimenting with variants to keep your style original and fresh. Here’s a step-by-step guide to help you perform baby windmills like a pro:
Step One – Master the Basics
Before attempting baby windmills, it’s crucial to have a solid grasp of the fundamental breakdancing techniques. This includes not only understanding the mechanics of various moves but also developing the strength and control needed to execute them smoothly.
- Windmills Without Hands: Start by practicing windmills without using your hands. This means you should be able to rotate continuously on your back without relying on your hands for support. Begin with slow rotations, gradually increasing your speed as you become more comfortable. Focus on maintaining a consistent rhythm and smooth transitions.
- Backspin with Crossed Legs: A strong backspin is essential for baby windmills. Practice achieving a stable backspin with your legs crossed, which helps in maintaining balance and control. Start from a stationary position, then gradually increase your speed. Aim for a smooth, continuous spin without losing your form.
- Floats and Handglide Position: Floats, particularly those involving the “handglide” position, are key to mastering baby windmills. The handglide position involves balancing on one hand while the rest of your body moves fluidly. Practice holding this position and transitioning into it from various moves. The stronger your handglide, the easier it will be to maintain momentum during baby windmills.
Step Two – Get Into Position
Positioning is critical when learning any new breakdancing move, and baby windmills are no exception. Starting correctly sets the stage for a successful execution.
- Head Position: Decide whether you’ll keep your head on the ground or in the air. While some dancers prefer the stability of having their head on the ground, others find it more comfortable to keep it elevated. Experiment with both to see which works best for you. Remember, keeping your head in the air reduces the risk of neck strain.
- Basic Positioning: Begin by squatting down with your hands placed firmly in front of you, fingers spread wide for stability. This initial squat helps you gather the energy needed to lift off. Push off the ground, lifting your legs into the “handglide” position. Ensure your arms and core are engaged to support your weight and maintain balance.
Step Three – Generate Momentum
Generating momentum is the driving force behind baby windmills. Proper technique ensures smooth and controlled rotations.
- Leg Swing: Swing your left leg counterclockwise with a powerful, controlled motion. Your left elbow should be tucked into your gut to help maintain balance and direction. The leg swing provides the initial momentum needed to start the rotation. Focus on a strong, fluid motion to avoid jerky movements.
- Pushing Off: As your leg swings around, use your core and arms to push off the ground. This push adds to the momentum generated by your leg swing. Timing is crucial here; coordinate the leg swing and push-off for maximum efficiency. Keep your movements synchronized to maintain a smooth flow.
- Knee Position: Keep your knees slightly bent during this phase. Bending your knees provides more control and flexibility, allowing for smoother transitions between movements. Straight legs can make it difficult to adjust your form mid-rotation, potentially disrupting your momentum.

Step Four – Correct Entry
The entry phase is vital for transitioning from a standard windmill into a baby windmill. Proper entry sets the foundation for continuous rotations.
- Leg Crossing: As you initiate the windmill, cross one leg over the other. This crossing motion helps maintain balance and sets you up for the backspin position. Practice this motion separately to get comfortable with the leg crossing without disrupting your balance.
- Backspin Position: Move into the backspin position, ensuring your back stays elevated. A high position on your back reduces friction and allows for smoother spins. Practice holding this position while maintaining your momentum.
- Arm Swing: Use your arms to aid in generating rotation. Swing your arms in sync with your legs to maintain a consistent rotational speed. The arm swing compensates for the lack of continuous leg momentum, providing the necessary force to keep you spinning.
- Stab Freeze Transition: Practice transitioning from a stab freeze to a backspin with crossed legs. This transition helps build the coordination needed for smooth entries into baby windmills. Focus on maintaining your balance and momentum during the transition.
Step Five – Full Munchmills
Executing full baby windmills involves combining all the previous steps into a seamless flow. This final phase focuses on refining your technique and achieving continuous rotations.
- Leg Extension and Arm Swing: After the initial entry, extend your legs and swing your arms to maintain momentum. Each rotation should involve a smooth, controlled extension of the legs and a coordinated arm swing. Practice this motion repeatedly to build muscle memory and fluidity.
- Tucking Legs: As you land on your back with each shoulder, tuck your legs in. This tucking motion prepares you for the next rep and helps maintain your rotational speed. Focus on a quick, controlled tuck to avoid disrupting your momentum.
- Combining Reps: Work on combining multiple reps over time. Start with a few rotations, gradually increasing the number as you become more comfortable. Aim for a smooth, continuous flow between reps, minimizing any pauses or disruptions.
- Early Leg Crossing: Cross your legs as early as possible during each rotation. Early leg crossing helps maintain balance and control, making it easier to transition smoothly between reps. Practice this timing to achieve a more fluid entry.
- Momentum Maintenance: Unlike conventional windmills, baby windmills rely on arm swings and leg tucks to maintain momentum. Focus on perfecting these techniques to keep your rotations smooth and continuous. Practice regularly to build the strength and coordination needed for consistent performance.
Additional Support
Consider signing up for specialized breakdancing courses to receive professional guidance and structured practice routines. These courses can provide valuable insights and personalized feedback to help you master baby windmills more efficiently.
By following these expanded steps and dedicating time to regular practice, you’ll be well on your way to performing baby windmills with confidence and style.
Summary
The baby windmill is a dynamic and challenging variation of the classic windmill in breakdancing. Mastering this move requires a strong foundation in basic breakdancing techniques, including windmills without hands, backspins with crossed legs, and floats in the handglide position.
The process involves getting into the correct starting position, generating momentum through leg swings and pushes, and maintaining control with proper entry techniques. Achieving full baby windmills requires combining leg extensions, arm swings, and timely tucks for continuous rotations. This guide provides a comprehensive, step-by-step approach to learning baby windmills, making it accessible for both beginners and experienced dancers looking to enhance their skills.


Leave a reply