What is Breakdance? Breakdance, also known as breaking or b-boying/b-girling, is a dynamic and acrobatic form of street dance that originated in the Bronx borough of New York City during the late 1960s and early 1970s. It is one of the key elements of hip-hop culture, alongside DJing, MCing (rapping), and graffiti art. Breakdancing is characterized by its combination of intricate footwork, athleticism, improvisation, and creativity. It incorporates a wide range of movements such as spins, freezes, flips, and intricate footwork patterns, often performed to the beats of hip-hop music.
This guide aims to take you through the steps of performing basic breakdancing moves. Breakdancing is not only a lot of fun but also a great form of exercise. With enough practice, you can make your moves look impressive. Whether you’re skinny or buff, short or tall, anyone in decent shape can learn to breakdance. And if you’re not in shape yet, dancing is a fantastic way to get fit! While basic breakdancing moves can be learned relatively quickly, mastering them and making them look sharp takes time and dedication. As long as you have a passion for dancing, you’ll do great! In this article, readers will join Learn Breakdance to explore basic breakdancing freezes and footwork.
Step 1: Basic Footwork: Sixstep

Begin in a position where your hands and feet are on the floor, with your butt slightly lifted and your feet positioned in front of you. Your palms should be touching the ground. As you improve, you can elevate your six-step by having only your fingers and the first row of knuckles on the floor. Eventually, as your hands become stronger, you’ll be able to perform a six-step with just your fingertips touching the ground.
Step 1: Right leg hook
Start by hooking your right leg around your left leg. To do this, position the inside of your right knee against the shin of your left leg. Ensure that your right leg is wrapped securely and snugly around your left leg, creating a firm and stable hook. This position will form the foundation for the next steps in your breakdancing move. Take your time to get comfortable in this stance, as it is crucial for maintaining balance and fluidity in your movements.
Step 2: Left leg back
In this step, you will move your left leg straight back while simultaneously lifting your left arm. Make sure to extend your leg fully behind you, keeping it as straight as possible to maintain balance and control. As you lift your left arm, shift your weight onto your right arm and both feet to stabilize yourself. This motion helps set up the foundation for the next movements in your breakdancing sequence. Take your time to practice this step, ensuring smooth and coordinated movement between your leg and arm.
Step 3: Right leg through
In this step, you will slide your right leg underneath your body, threading it between your right arm and your left leg. As you do this, make sure to post your left hand to the side and slightly in front of you for support. This hand placement is crucial as it helps maintain your balance and control throughout the movement. By keeping your weight evenly distributed, you’ll be able to execute the step smoothly and with more precision. Take your time to practice this move, ensuring that your right leg glides effortlessly under your body while your left hand provides the necessary stability.
Step 4: Left leg through
In this step, you will need to slide your left leg underneath your body. Start by bringing your left leg across, moving it between your right leg and left arm. Make sure to keep your movements smooth and controlled, ensuring that your left leg glides effortlessly beneath you. This maneuver is essential for transitioning into the next phase of the breakdance move, so practice it until you can execute it seamlessly.
Step 5: Right leg forward
In this step, you’ll move your right leg forward by lifting it and positioning your right shin into the socket of your left knee. Make sure to keep your movements smooth and controlled to maintain balance. This position helps you transition fluidly into the next step of your breakdancing routine. Take your time to practice this motion until it feels natural and seamless.
Step 6: Left leg unhook, back to start
Unhook your left leg from around your right leg, returning to the starting position. You should now be ready to repeat the sequence.
Don’t worry about doing the six-step quickly at first. Focus on performing each move accurately and separately. Speed will develop over time. The more you concentrate on mastering the basics now, the sharper and faster your moves will become later.
Step 2: Babyfreeze

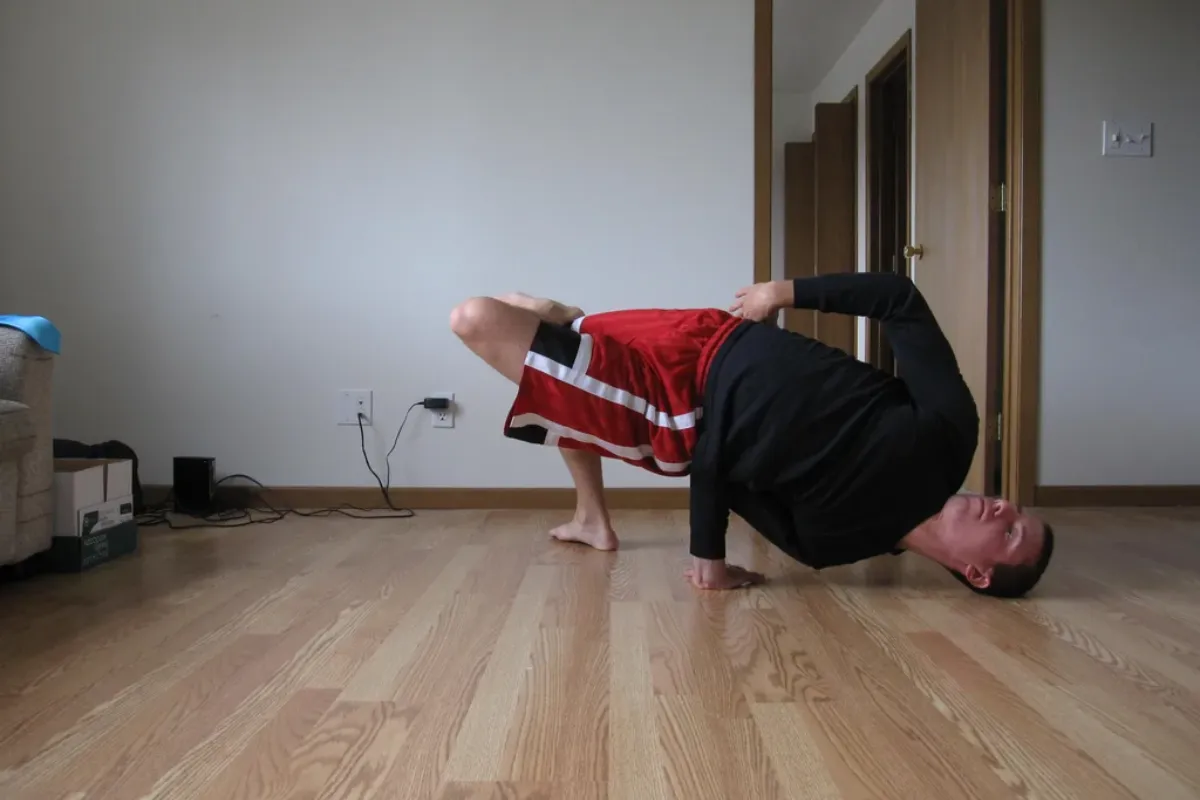
The baby freeze is a relatively simple freeze to perform and is easy to transition into from a six-step.
- Starting Position: Place your palms flat on the floor, feet on the ground, and arch your back upward.
- Step 1: Position your right knee directly on top of your right elbow, near the end of your tricep muscle.
- Step 2: Lean forward slightly, shifting your weight onto your right arm, while using your left arm for balance.
- Step 3: Extend your left leg behind you, using it to help balance your weight.
Step 3: Handglide Freeze
The handglide freeze is another basic freeze that’s easy to transition into from a six-step. It’s also the starting position for more advanced power moves like windmills and, of course, the handglide.
- Starting Position: Place your palms flat on the floor with your feet on the ground. Ensure your left hand’s fingers are pointing to the left.
- Step 1: Lower yourself onto your left arm so that your forearm is perpendicular to the floor and your left bicep is parallel to it. “Stab” your left elbow into the left side of your abdominal muscles. At this point, most of your weight should be on your left arm.
- Step 2: Lift your legs, shifting them slightly to the left to balance your weight. Use your right arm for additional stability.
- Step 3: Lift your right arm off the floor, balancing solely on your left arm. All of your weight should now be on your left arm. Maintain your balance by shifting your legs further to the left and leaning your body slightly in the same direction.
Step 4: Chair Freeze

The chair freeze is another relatively simple freeze to transition into from the six-step. It’s slightly more challenging than the handglide due to the awkward stabbing angle, but it looks impressive when executed crisply.
- Starting Position: Lie flat on your stomach with your palms flat on the floor and close to your sides, elbows pointing upwards.
- Step 1: Keeping your arms stationary, roll over onto your left arm so that your left elbow is stabbing into the side of your lower back, just below the hip bone but above the left buttock.
- Step 2: Lean forward and rest your head on the floor while keeping your left foot flat on the ground.
- Step 3: Lift your left leg and place it on top of your right leg, similar to how you might sit in a chair. Your right foot should be flat on the ground, and your left foot should rest on top of your right knee, forming a 90-degree angle.
Step 5: Kip-up
A kip-up, though predominantly seen in gymnastics or martial arts, is a remarkable and swift technique for getting off the ground.
- Starting Position: Lie flat on your back with your legs raised at a 90-degree angle, resembling the start of a crunch. Your hands are positioned near your head.
- Step 1: Roll back onto your upper back while bringing your knees towards your face. Reach your fingertips to the ground behind your head, preparing to push off. Visualize your body as a coiled spring, ready to propel upward.
- Step 2: Propel your legs upward and outward at a 45-degree angle, simultaneously arching your back and pushing off with your hands. Warning: It’s crucial to release all your energy explosively outward and upward. Holding back may result in falling onto your back, potentially causing discomfort. Your instinct might try to protect you from this perceived danger, but you must override it and commit fully. Trust yourself; you can do it!
- Step 3: Stick the landing on your feet!
Conclusion
This guide has guided you through the steps of several fundamental breakdancing moves. As you continue practicing, remember to start slow and focus on mastering the techniques before gradually increasing your speed. It’s essential to prioritize precision over complexity; simple moves executed crisply often have a more impressive impact than advanced moves performed sloppily. Ideal practice spaces include gyms, dance studios, and floors made of tile or linoleum. Breakdancing demands considerable dedication and practice to see improvement, but if you’re passionate about dancing and committed to investing the time, success is within reach!


Leave a reply