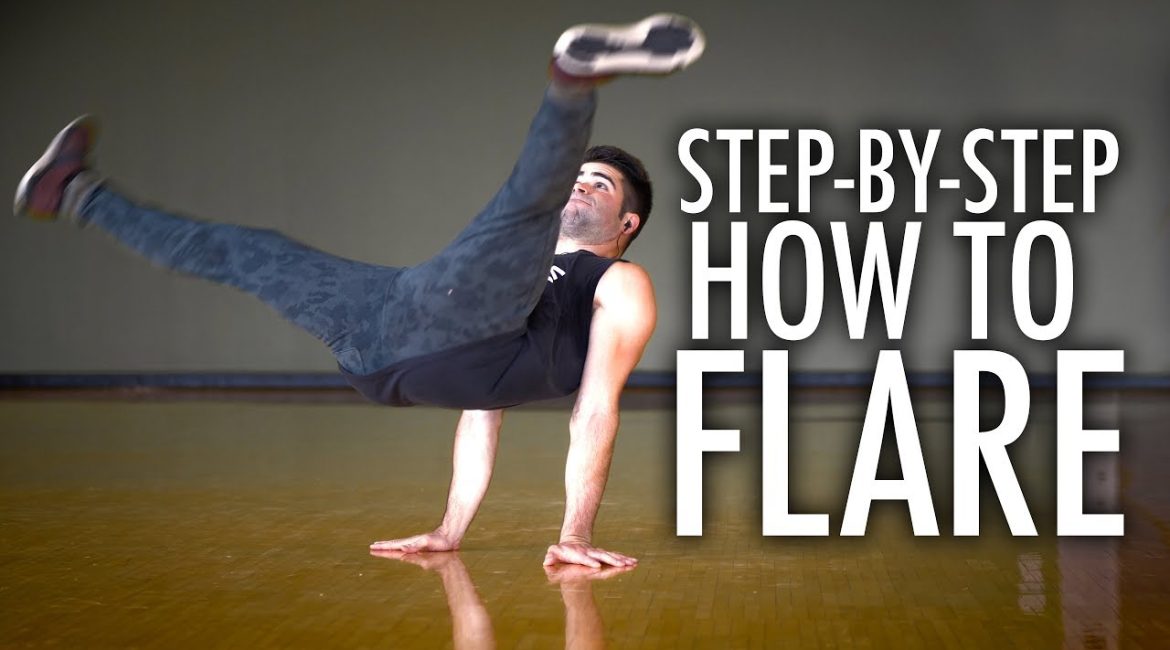
Welcome to your comprehensive guide on mastering one of the most dynamic and visually impressive breakdancing moves – the Flare. Whether you’re a budding B-Boy or B-Girl, or simply someone looking to challenge their physical limits, this tutorial will walk you through everything you need to know to start executing flares with confidence and finesse.
0:00 – Introduction
In breakdancing, a Flare is not just a move but a statement. It requires a blend of strength, flexibility, and technique. Before we dive into the specifics of performing a flare, it’s essential to prepare your body for this demanding move. General flexibility and body weight strength are crucial, as they will significantly determine your ability to perform and sustain flares without injury.
0:54 – Learning Flares
Learning the flare in breakdancing is about understanding the flow and mechanics of your body as it moves through space. This move, which originated from gymnastics and was adapted into breakdancing, showcases not only your physical prowess but also your understanding of rhythm and momentum. Here’s a more detailed breakdown of each step involved in learning to perform a flare:
Step 1: Preliminary Stretching and Strength Building
Before attempting flares, ensure your body is adequately prepared. Flexibility and strength are crucial:
- Flexibility: The seated straddle, or “flare stretch,” improves the range of motion in your hips and legs, which is essential for executing wide, sweeping leg movements without strain.
- Strength: Core and upper body strength are vital. Exercises like L-sits and tucked planches build the necessary muscular foundation. While these aren’t mandatory before starting flares, they facilitate quicker learning and safer execution.
Step 2: Choosing Your Spin Direction
Determine whether you will spin clockwise or counterclockwise. This choice affects which limbs you will predominantly use:
- Counterclockwise: Most common, using left arm and left leg to initiate.
- Clockwise: Uses right arm and right leg to initiate.
For this tutorial, we’ll focus on the counterclockwise direction, which is more commonly used among breakdancers.
Step 3: The Initial Movement
Positioning and the first movement are critical in setting up the rest of the flare:
- Starting Position: Stand with your feet together. Step out sideways with your left leg (for counterclockwise flares), placing your left hand on the ground beside your left foot. This setup is crucial for stability and momentum.
- First Contact: Ensure your hand and foot are close to maintain balance and control as you begin the flare.
Step 4: The First Sweep
The first sweep is where the flare truly begins:
- Sweep and Kick: With pressure on your left arm, swoop your left leg horizontally around towards your right heel. Simultaneously, kick your right foot up towards the sky. This dual action creates the rotational momentum needed to lift your body off the ground.
- Weight Shift: Lean heavily on your left arm as you kick. This not only helps lift your hips but also starts the circular motion that defines a flare.
The initial sweep sets the tone for the entire movement, providing the necessary momentum to carry through with subsequent rotations.
Step 5: Developing Momentum
After the initial kick and sweep, your body will begin to rotate. Here’s how to maintain and control this momentum:
- Continuous Motion: As your left leg comes around to meet your right heel, continue the motion by swinging your right leg up and over in a wide arc. This movement should feel fluid and continuous.
- Arm Switch: As your body rotates, prepare to switch your supporting arm. After pushing off with your left arm, your right arm should come down to the ground to support the next phase of the rotation.
Each step in learning flares is about understanding and harmonizing the interactions between your limbs, core, and ground contact. This synchronization ensures not only the aesthetic fluidity of the flare but also its effectiveness as a power move in breakdancing.
By dissecting these steps and practicing diligently, you can develop a solid foundation for performing flares, building up from basic movements to more complex and fluid executions as your strength, flexibility, and technique improve.
2:45 – The Blocking Principle
The Blocking Principle is a crucial concept in mastering the flare, as it directly affects the height, control, and sustainability of the move. This principle involves managing your body’s mechanics to maximize leverage and stability during the rotation. Here’s a detailed exploration of how to implement the Blocking Principle effectively when performing flares:
Understanding the Blocking Principle
In breakdancing, “blocking” refers to the strategic placement and use of your arms to create angles that help counterbalance your body against gravity. This technique is essential in moves like the flare, where maintaining a certain height off the ground is crucial for both aesthetics and the smooth execution of the move.
Application in Flares
When performing a flare, the blocking principle comes into play as follows:
- Angle Creation: As your legs sweep around in the flare, your body naturally wants to sag or drop due to gravity. To counteract this, you must use your arms to push against the ground at an angle. This angled pushing helps lift and sustain your body horizontally off the ground.
- Weight Distribution: Properly angling your arms allows for better weight distribution across your body. It prevents your hips and legs from dragging on the floor, which can interrupt the flow and speed of the flare.
Step-by-Step Implementation
Here’s how to apply the blocking principle during the different phases of the flare:
- Front Block:
- As your legs come forward (e.g., left leg sweeping towards the right in a counterclockwise flare), you should lean your upper body slightly backward.
- This leaning creates an angle where your arms push back against the ground, elevating your hips and legs. This action is similar to a seesaw, where your arms push down to lift the other side (your legs) up.
- Side Block:
- When transitioning through the sides, your body should lean towards the opposite side of the direction of your legs. For instance, if your legs are sweeping to the left, your upper body should lean to the right.
- This action creates lateral stability and helps maintain a consistent height as you transition through the side phases of the flare.
- Back Block:
- As your legs move to the back, the tendency is for the hips to drop, which can reduce the flare’s height and speed. To counter this, you should lean your upper body forward.
- This forward lean shifts your weight ahead of your legs, preventing them from dropping too low and helping to propel them upwards as they complete the rotation.
Key Points to Remember
- Continuous Arm Pressure: Throughout the flare, keep a continuous and firm pressure with your arms against the ground. This consistent pressure is vital for sustaining the blocking angles and for providing the necessary support to your rotating body.
- Dynamic Adjustments: As you become more comfortable with the mechanics of the flare, you will learn to make slight adjustments in your arm pressure and body angles in response to your body’s momentum and the ground’s feedback.
Mastering the Blocking Principle is not just about physical execution but also about understanding the physics behind the move. By practicing this technique, you can significantly enhance your flare’s height, speed, and fluidity, making it not only more impressive but also more efficient and less taxing on your body. This principle, while challenging at first, becomes more intuitive with practice and is essential for advancing in breakdancing.
5:04 – Hip Exercise to Enhance Flare Performance
One of the lesser-known but highly effective exercises for enhancing your flares focuses on hip mobility and strength. This exercise, while simple in execution, is crucial for developing the muscle memory and core control necessary to execute high-quality flares. Below is a detailed guide on how to perform this hip exercise and incorporate it into your training regimen.
Purpose of the Hip Exercise
The hip exercise targets the core and hip muscles, both of which play pivotal roles in the dynamics of the flare. Strong hips and a robust core enable you to lift your body higher off the ground, maintain stability during rotations, and control the movement’s flow and precision. This exercise specifically helps to:
- Increase hip elevation during the flare.
- Strengthen core muscles to improve overall control.
- Enhance muscle memory related to the flare’s rotational mechanics.
How to Perform the Hip Exercise
- Starting Position:
- Begin by lying on your side. This position mimics the mid-flare position where your body is sideways relative to the ground.
- Rest your lower arm on the ground for stability, and keep your legs extended straight.
- Execution:
- Lift your hips off the ground by pushing down with your lower arm and using your oblique muscles. Your body should form a straight, diagonal line from your feet to your head.
- As you lift your hips, also raise your upper leg to increase the stretch and engagement across your hip muscles. This movement should resemble part of the flare motion where your legs are separated and elevated.
- Hold and Tighten:
- Hold the elevated position for a few seconds, tightening your core and hip muscles. This action not only builds strength but also familiarizes your body with the sensation of lifting and holding your hips high—a crucial aspect of performing a high flare.
- Lower your hips and repeat the exercise several times. Perform this exercise on both sides to ensure balanced strength and flexibility.
Integration into Flare Training
To effectively integrate this hip exercise into your flare training routine, consider the following tips:
- Frequency: Perform this exercise as part of your regular workout routine, ideally at the beginning as a warm-up or at the end to reinforce muscle memory.
- Repetitions and Sets: Start with a manageable number of repetitions, such as 10 lifts per side, and increase as your strength improves. Aim for 2-3 sets per session.
Advanced Variations
As you progress, you can introduce variations to this exercise to further challenge your muscles and improve your flare:
- Weighted Hips: Add a small weight on your hip to increase resistance as you lift. This addition will further strengthen your core and hip muscles.
- Dynamic Leg Movements: Instead of simply lifting your upper leg, sweep it in a semicircular motion to mimic the actual leg movement during a flare. This variation enhances coordination and muscle control.
The hip exercise is a targeted and effective way to enhance the core and hip strength necessary for performing flares in breakdancing. By regularly incorporating this exercise into your practice sessions, you can significantly improve the height, control, and fluidity of your flares. Remember, the key to mastering complex breakdancing moves like the flare lies not just in understanding the steps but also in conditioning your body to perform them effortlessly and safely.
Conclusion
Flares require practice and patience. Start slowly, focusing on mastering each step and understanding the mechanics behind the movement. Use the blocking principle to maintain your form and prevent injuries, and don’t forget to incorporate the hip exercise into your routine for improved performance.
Remember, every dancer starts somewhere, and with consistent practice, you can make significant improvements. Embrace the process, keep pushing your limits, and most importantly, have fun while doing it!
Closing Remarks
Thank you for reading this step-by-step guide on learning to do flares. Whether you’re training in a studio or practicing at home, keep striving for improvement and precision. Don’t forget to subscribe for more tutorials and tips. Happy dancing, and see you on the dance floor!


Leave a reply