Step right into the exciting realm of the one arm handstand, where strength and balance intertwine to create a breathtaking spectacle! This mesmerizing feat has captivated the hearts of numerous individuals who are passionate about calisthenics and fitness. Whether you fancy yourself as a gymnast, a calisthenics enthusiast, or simply someone eager to challenge your physical and mental limits, mastering the one arm handstand stands as a remarkable achievement.
Now, let’s embark on the journey of mastering the one arm handstand together! In this comprehensive guide, we will unveil a plethora of tips, techniques, and training drills tailored to help you hone your skills and elevate your performance.
So, are you ready to dive in and unravel the mysteries behind mastering the one arm handstand? Along the way, we’ll also unveil some intriguing secrets to enhance your learning experience! Let’s get started on this exhilarating adventure!
General things about one harm handstand

Definition
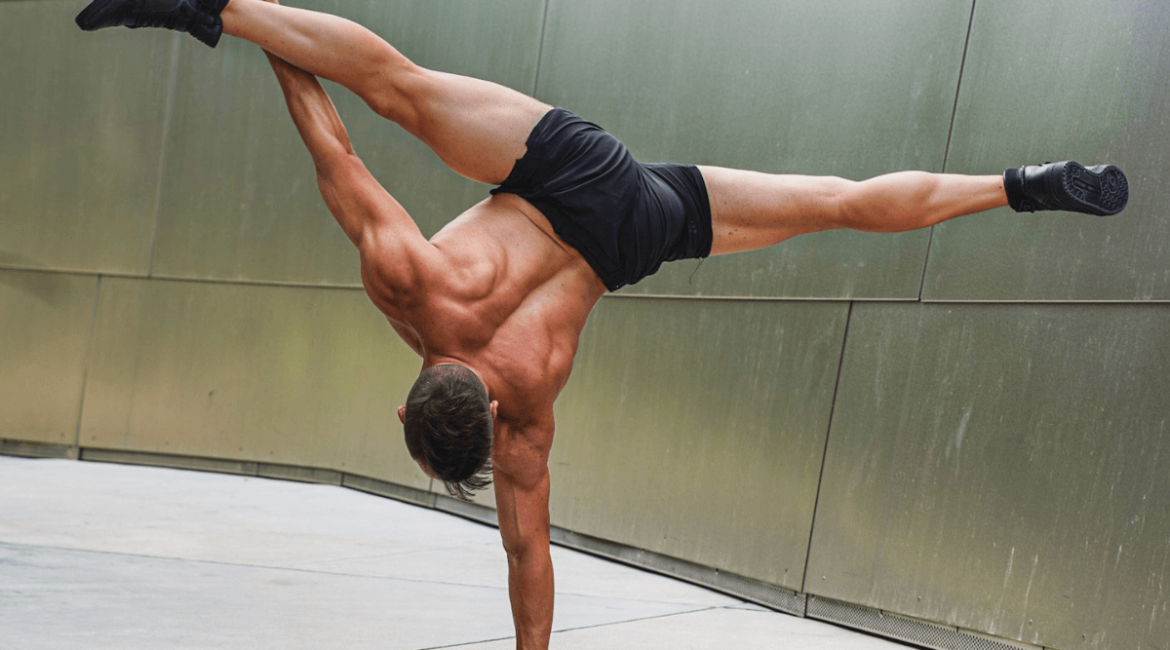
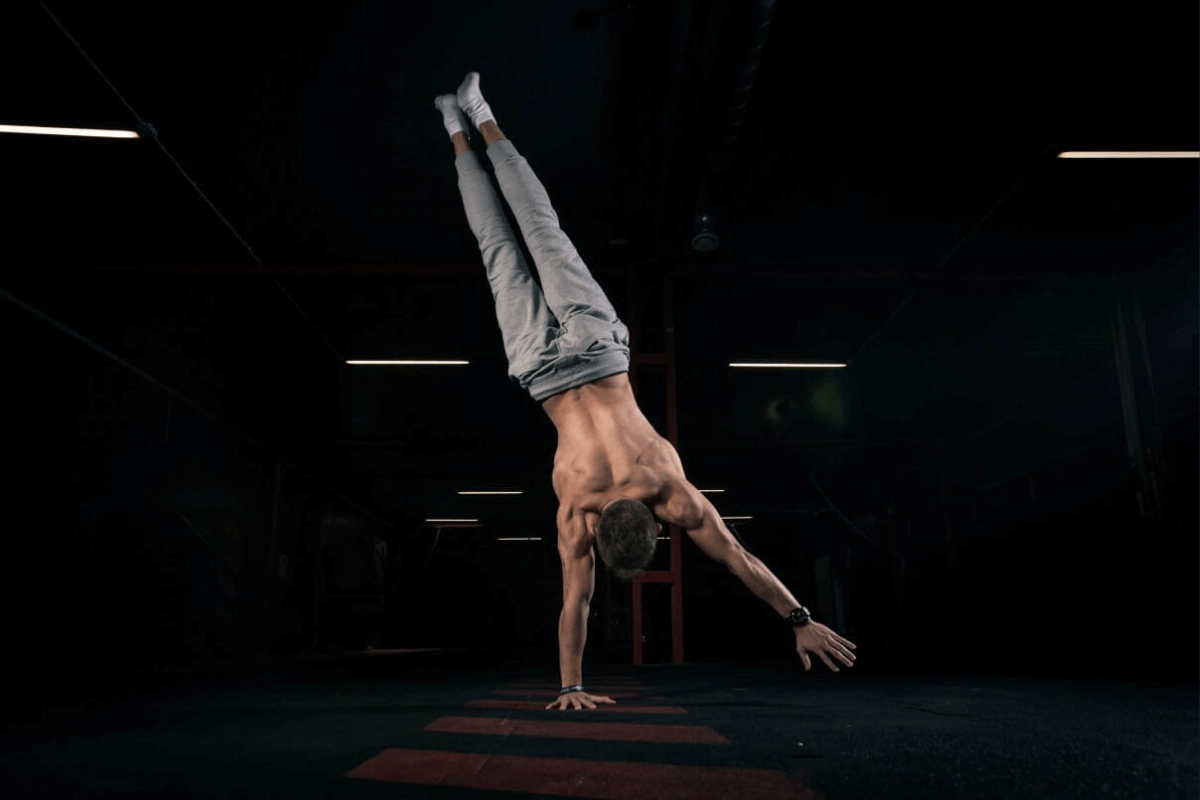
What is one arm handstand? The one arm handstand, also known as the one-handed handstand, presents a formidable challenge in the world of handstands. Unlike the traditional handstand where both arms support the body, in this variation, only one arm bears the weight while the other arm extends to the side.
Mastering the one arm handstand demands not only robust arm muscles but also a stable core, flexible wrists, and precise body control. It’s a true test of strength and balance combined.
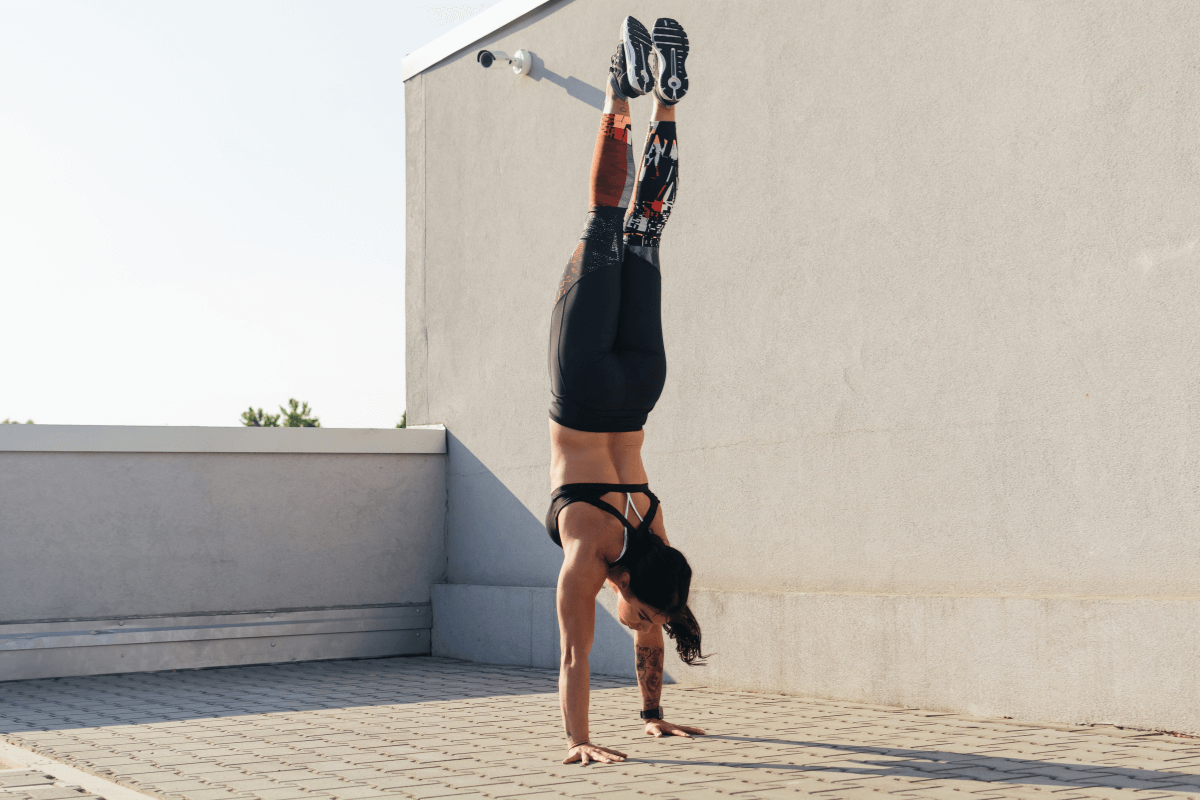
Before diving into the one-handed handstand, it’s crucial to lay a solid foundation by mastering the standard handstand with both arms. Spending time practicing and perfecting the two-arm handstand, aiming for a balance duration of 30 to 60 seconds, is key. This not only strengthens your muscles but also hones your ability to maintain balance.
Once you feel confident and steady in the two-arm handstand, you can gradually progress to practicing with just one arm. This gradual approach allows your body to adapt and build the necessary strength and coordination required for the challenging one arm handstand.
The requirements
Before embarking on the journey to master the one-handed handstand, it’s essential to establish a solid groundwork. Strengthening and enhancing your wrist mobility, maintaining a stable core, and cultivating flexible shoulders are crucial aspects to focus on.
- Start by building up the strength and flexibility in your wrists. This involves performing exercises that target the muscles and joints in your wrists, gradually increasing their capacity to support your body weight.
- Next, concentrate on stabilizing your core muscles. A strong core provides the necessary stability for maintaining balance during the one-arm handstand. Engage in exercises that target your abdominal muscles, obliques, and lower back to build core strength and stability.
- Additionally, work on developing strong and flexible shoulders. Shoulder strength and mobility are essential for supporting your body weight and controlling your movements during the one arm handstand. Incorporate exercises such as shoulder presses, lateral raises, and shoulder mobility drills to strengthen and improve the flexibility of your shoulders.
Keep in mind that the skills and strength you develop while learning the one-handed handstand will not only enhance your performance in this challenging calisthenics move but will also benefit you in other exercises within the realm of calisthenics.
Now, let’s delve deeper into each of these aspects to provide you with a comprehensive understanding of how to build a strong foundation for the one arm handstand.
Enhancing wrist strength and flexibility
Achieving a smooth and pain-free one arm handstand requires wrists that are both sturdy and flexible. Strengthening your wrists is vital to support your body weight effectively. Incorporate exercises like wrist push-ups, wrist curls, and wrist extensions into your regular practice routine to build wrist strength gradually.
Furthermore, don’t forget to include wrist stretches and mobility exercises in your regimen. These movements help increase the range of motion in your wrists, allowing them to move more freely and adapt to various positions. By improving wrist flexibility, you reduce the risk of discomfort, injury, and instability while performing the one arm handstand.
Core stability: The foundation of balance
A solid core is the cornerstone of mastering the one arm handstand. It provides the stability needed to maintain balance and control throughout the movement. Strengthening your core muscles is essential to support your body weight and prevent wobbling or collapsing during the handstand.
Incorporate core-strengthening exercises such as planks, hollow holds, and leg raises into your training routine. These exercises target the muscles in your abdomen, lower back, and pelvis, helping you develop both strength and endurance in your core.
Remember, achieving balance in the one-arm handstand not only requires strength but also endurance. Training your core muscles to maintain stability over an extended period is key to mastering this challenging calisthenics move.
Cultivating shoulder strength and flexibility
Achieving robust and flexible shoulders is paramount for mastering this version of handstand. Your shoulders play a crucial role in supporting your body weight and facilitating smooth movements during the handstand.
To strengthen your shoulders, incorporate exercises like shoulder presses, push-ups, and shoulder stretches into your workout routine. These exercises target the muscles surrounding your shoulder joints, helping to increase strength and stability.
In addition to traditional shoulder exercises, try incorporating handstand shrugs and scapular push-ups into your routine. These exercises target the smaller muscles surrounding the shoulders, helping to improve balance and stability during the one arm handstand.
Mastering this version of handstand requires patience and practice. While it may seem challenging initially, consistent training and dedication will lead to improvement over time. Stay focused, stay determined, and keep pushing yourself to reach your goals!
How to do one arm handstand?
Becoming proficient in the one arm handstand requires specific exercises and drills designed to build strength and stability. In addition to focusing on strength, it’s essential to work on improving your balance. While mastering the this version of handstand may not come easily to everyone, perseverance and dedication are key!
Keep in mind that you may benefit from training aids such as resistance bands or partner-assisted exercises to assist you in your journey. Here are some strategies and drills to support you along the way:
Mastering the two – arm handstand
To perform a strong two-arm handstand, it’s essential to keep a few key points in mind.
- Firstly, ensure that your body is properly aligned. Your hands should be shoulder-width apart, and your arms should be straight. Focus on maintaining a straight line from your wrists to your shoulders and hips.
- Engage your shoulders actively by pushing through your hands and lifting your shoulders towards your ears. This helps distribute your weight evenly and provides stability.
- Keep your core muscles tight throughout the handstand to provide support and control. Imagine drawing your belly button towards your spine to maintain a stable position.
To begin practicing the two-arm handstand, start by using a wall for support.
- Kick up into the handstand position with your back facing the wall, allowing the wall to provide stability and alignment feedback.
- Practice holding the handstand against the wall, focusing on keeping your body straight and your core engaged.
- As you become more comfortable, gradually move away from the wall, practicing longer holds with control and stability. Aim to find your balance without relying on the wall for support.
In addition to static holds, incorporate dynamic movements to strengthen your two-arm handstand. Practice walking on your hands to improve balance and coordination. You can also incorporate handstand push-ups to build strength in your shoulders and arms.
Consistent practice and patience are key to mastering the two-arm handstand. Focus on maintaining proper form, engaging your muscles, and progressing at your own pace. With dedication and perseverance, you’ll continue to improve and refine your two-arm handstand skills over time.
One arm handstand guidance
- Progress to One-Arm Support: Once you feel comfortable and confident in the two-arm handstand, begin practicing shifting your weight onto one arm. Start by placing more weight on your dominant arm while slightly lifting the other arm off the ground. Use a wall for support if needed, gradually reducing the amount of support as you gain strength and control.
- Strengthen Your Support Arm: Focus on strengthening the arm that supports your body weight during the one arm handstand. Incorporate exercises such as single-arm push-ups, handstand shrugs, and scapular push-ups to build strength and stability in this arm.
- Work on Balance and Control: Practice holding the one arm handstand position against a wall or with the assistance of a spotter. Focus on maintaining a straight body line and engaging your core muscles to control your balance. Start with short holds and gradually increase the duration as you improve.
- Refine Your Technique: Pay attention to your body positioning and alignment during the one arm handstand. Keep your supporting arm straight and your shoulders stacked over your wrist. Engage your core muscles to prevent arching or collapsing in your back.
Supplemental exercise – Single-arm plank
- To perform this exercise, begin by positioning yourself as if you’re about to do a standard plank.
- Instead of placing both arms on the floor, shift all your weight onto one arm while extending the other arm out to the side or placing it on your hip.
- Engage your core muscles to hold yourself up in this position for a period of time.
Don’t fret if you’re unable to maintain it for an extended duration initially; simply aim to increase your time gradually as your strength improves. Then, switch to the other arm and repeat the exercise.
If you need a more detailed guide, this YOUTUBE video is a must that you should watch!
Leave a reply