If you’ve ever watched breakdancing, you’ve probably seen those impressive moments where dancers suddenly stop and strike eye-catching poses that seem to defy gravity. These poses are called “freezes,” and they are an essential part of the b-boying (or breakdancing) culture. In this blog post, we’ll explore what freezes are, why they’re important, different types of freezes, and how they are performed.
What are Freezes?
A freeze in b-boying refers to a technique where all body motion is stopped, typically in a captivating or balance-demanding pose. The idea is to hit a position and maintain it as if paused in motion, akin to freezing into ice. Freezes frequently involve intricate twists and contortions of the body, executed in stylish and challenging postures.
Spins are frequently integrated with freezes, often executed with high kicks. Breakers can freeze in various handstand positions like “inverts”, “Nikes”, and “pikes”. Advanced breakers also incorporate threading into handstands by creating a loop with one arm and leg, then weaving the other leg in and out of this loop.
Why are Freezes Important?
Freezes are important for several reasons:
- Showcasing Skill: They demonstrate a dancer’s strength and ability to control their body.
- Adding Variety: Freezes break up the fast-paced movements of breakdancing routines, providing moments of stillness and focus.
- Highlighting Creativity: Dancers can use freezes to express their unique style and personality.
- Creating Transitions: Freezes can be used to smoothly transition between different dance moves or to emphasize key moments in a routine.
Types of Freezes
There exist numerous freeze variations, often categorized by which part of the body touches the ground. Initially, there were “chin freaks”, Tracks, Splits, deadman freeze, and chairs. For instance, a “headstand freeze” involves only the breaker’s head touching the ground, with similar variations for handstand, forearm, elbow, and shoulder freezes. Adding “one-handed” or “two-handed” can further describe these freezes. Additionally, there are less intuitively named freezes such as:
- Planche – This freeze involves positioning your body parallel to the ground, supported by straight arms while exerting strength to hold your body weight.
- Baby Freeze – Balance is achieved using the hands, with one side of your waist resting on one elbow and a knee on the other, sometimes switching the placement of legs for variation.
- Airbaby – In this freeze, the knee rests on the elbow of the supporting arm to maintain balance and stability.
- Chair Freeze – This freeze involves lying down and arching towards the floor, with one arm stabbed into the back to support the body.
- Airchair – Similar to a chair freeze but with the head and feet off the floor, often facing the ceiling, and allowing for various leg positions.
- Elbow Airchair – This freeze is performed with one hand at the back and the supporting elbow pointed towards the ground, with hands and feet lifted off the floor.
- Double Airchair/Recliners – An advanced version of the Airchair freeze where both arms are positioned behind the back. This move requires extreme flexibility and is considered dangerous, typically performed by contortionists or highly skilled individuals.
- Handglide Freeze – Similar to the Turtle freeze, but with only one elbow stabbed into the abs while the other arm is extended out to the side, either placed on the ground or held above it.
- Hollowback – A challenging freeze where the body forms a bridge with the feet not touching the floor. Many variations of this freeze can be performed from a handstand, headstand, or on the elbows.
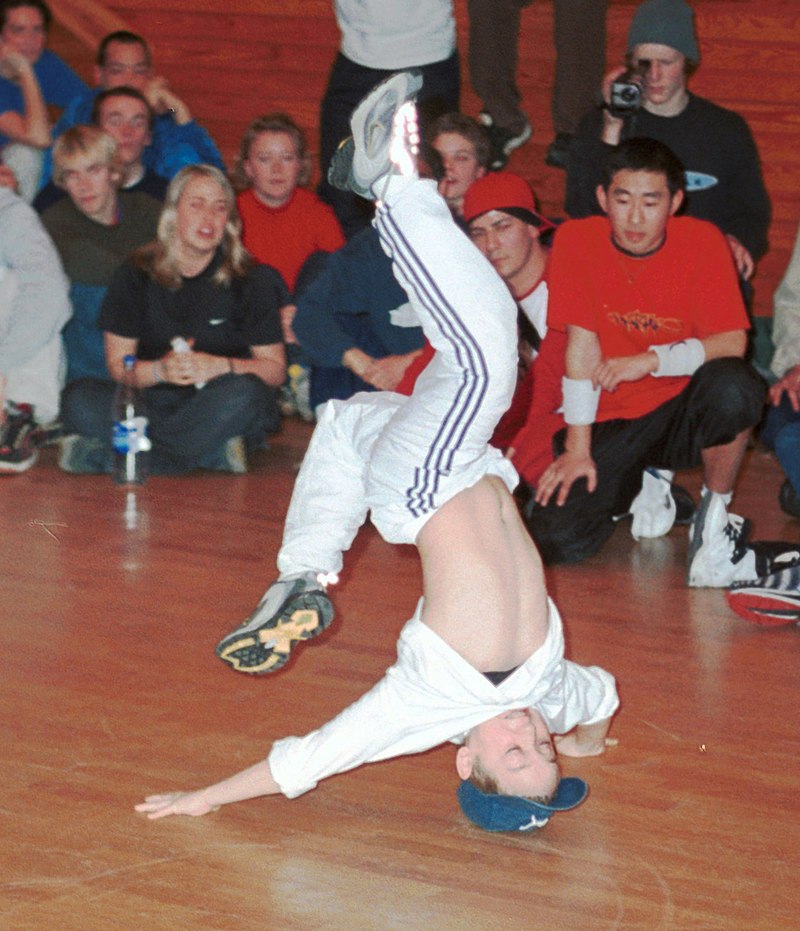
- Invert – An inverted version of the hollowback freeze where the body is crunched, bringing the face towards the legs to create a V shape, hence “inverting” the hollowback.
- O Freeze – A hollowback with an extreme arch where the feet touch the b-boy’s elbows, resembling the shape of an ‘O’.
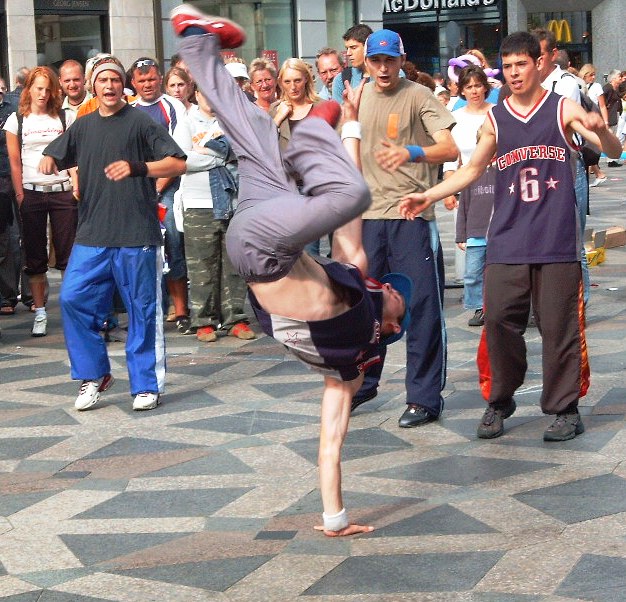
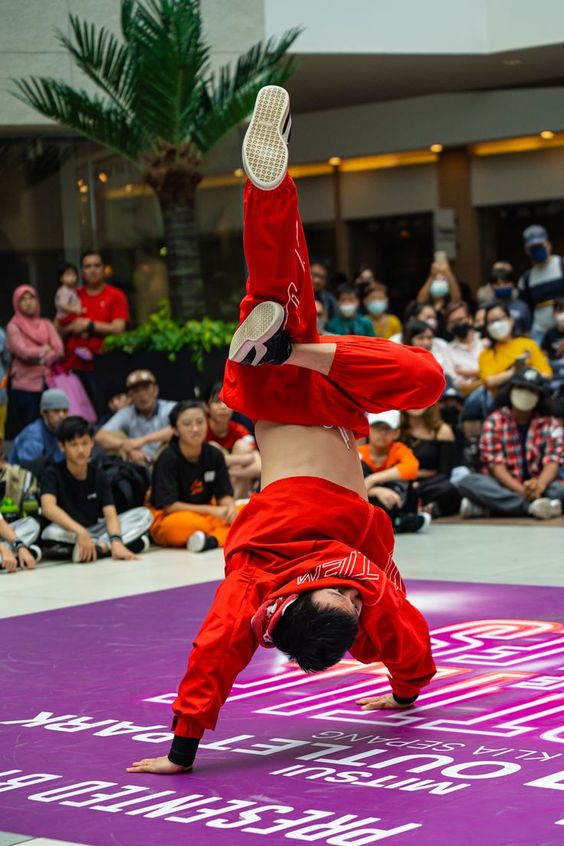
- Pike – A freeze where one hand is planted on the ground while the entire body is positioned perpendicular to the floor, with both feet held high up in the air.
- Turtle Freeze – In this freeze, both arms are bent in front of the chest with the elbows pressing into the abs or surrounding area. All body weight is supported by the hands, suspending the rest of the body above the ground. Similar to a float.
- Birthday Elbow – A freeze where the b-boy’s head rests on their hand, and the body is horizontal, facing the ground, with the weight supported on the elbow.
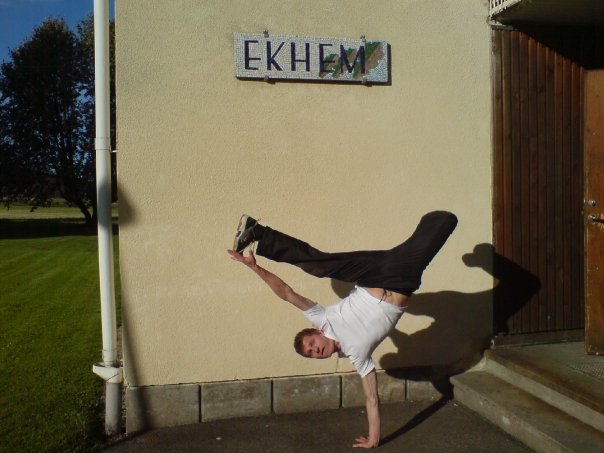
- Flag – Balancing on one hand while facing sideways and extending the other hand forward.
- L-Kick – Balancing on one hand while bending one leg at the knee and holding the end of a straight leg with the other hand.
- V-Kick – Balancing on both hands while extending the legs into a V-shape.
- Y-Freeze – Balancing on one hand while extending the legs to form a ‘Y’ shape.
- Shoulder Freeze – Balancing the body using the shoulder while positioning the legs freely.
How to Perform a Freeze
Performing a freeze requires practice and technique:
- Build Strength: Focus on exercises that strengthen your core, arms, and legs.
- Practice Balance: Work on improving your balance and body control.
- Learn Proper Form: Study tutorials and watch experienced dancers to understand the correct form for different freezes.
- Start Simple: Begin with basic freezes like the baby freeze and gradually progress to more challenging ones as you build confidence.
10 Basic BREAK DANCE FREEZES for Beginners
Watch this video for 10 Basic BREAK DANCE FREEZES for Beginners:
Video Summary: In this video tutorial by Kaio, you’ll learn ten essential breakdancing freezes perfect for beginners. Kaio breaks down each freeze step-by-step, providing helpful tips and demonstrations to help you master these foundational moves. Whether you’re new to breakdancing or looking to expand your skills, this tutorial is a must-watch!
Now, let’s dive into a detailed breakdown of each freeze covered in the video:
Shoulder Freeze
The shoulder freeze is a classic entry-level freeze that introduces you to balancing on your shoulder. Here’s how to nail this fundamental move:
- Positioning: Lean onto your shoulder, avoiding leaning too far back to prevent rolling over.
- Support: Use one arm for balance while lifting one leg off the ground.
- Practice Tip: Start with small lifts and gradually increase height and duration.
Turtle Freeze
The turtle freeze emphasizes balance and core strength. Follow these steps to achieve this dynamic freeze:
- Setup: Lean forward, resting your elbow near your belly button.
- Lift Off: Gradually lift both knees off the ground.
- Advanced Variation: Elevate your feet off the floor for a more challenging hold.
Baby Freeze
The baby freeze is a foundational move that transitions well into more complex freezes. Here’s how to perfect it:
- Setup: Begin with one arm supporting your body, positioning your head on the floor.
- Lift One Leg: Start by lifting one leg off the ground, gradually progressing to both legs.
- Balancing Tip: Experiment with different arm placements to find the most stable position.
Side Freeze
The side freeze showcases balance and flexibility. Follow these steps to execute this stylish freeze:
- Starting Position: Begin with one knee on the ground and the other leg extended.
- Lift Off: Lift your body off the ground, supporting your weight on one arm.
- Variations: Explore different leg positions and angles for added flair.
Chair Freeze
The chair freeze challenges your flexibility and core strength. Here’s how to master this unique freeze:
- Setup: Lean back with your elbow positioned near your waist.
- Leg Position: Extend one leg out to create the chair-like shape.
- Gradual Progression: Start with support from your other hand before lifting it off the ground.
Headstand
The headstand is a foundational move for advanced techniques. Follow these steps to achieve a stable headstand:
- Tripod Position: Form a tripod with your head and hands, legs extended.
- Leg Lifts: Practice lifting and lowering your legs while maintaining balance.
- Safety Tip: Start near a wall for support and gradually increase duration.
Airbaby
The airbaby freeze is an eye-catching move that combines balance and style. Here’s how to master it:
- Starting Position: Begin in a handstand-like position, one arm supporting your weight.
- Leg Kick: Kick one leg out to the side while keeping your body angled.
- Stability Tip: Focus on minimal body movement to maintain balance.
Elbow Freeze
The elbow freeze emphasizes arm strength and balance. Follow these steps to perfect this freeze:
- Setup: Lean onto your elbow, positioning your body in a diagonal line.
- Leg Lifts: Gradually lift and extend your legs while maintaining stability.
- Practice Both Sides: Ensure proficiency on both arms for versatility.
Handstand
The handstand is a fundamental skill essential for various breakdancing moves. Here’s how to progress into a stable handstand:
- Preparation: Start with handstand variations to build strength and confidence.
- Leg Positioning: Experiment with different leg shapes and transitions.
- Safety Note: Master the cartwheel for safe exits from the handstand.
Air Freeze
The air freeze is an advanced move that requires precise balance and control. Follow these steps to achieve this dynamic freeze:
- Starting Position: Begin in a handstand-like position, legs extended.
- Leg Kick: Kick one leg out to the side while keeping your body angled.
- Balancing Tip: Maintain a stable body position with minimal movement.
Congratulations on mastering these ten basic freezes for breakdancing! Remember, consistency and practice are key to improving your skills. Start with the easier freezes and gradually progress to the more challenging ones. Don’t forget to practice on both sides for balanced body control.
If you’re eager to level up your breakdancing journey, consider checking out additional tutorials and resources. Keep pushing your limits, exploring new moves, and embracing the creativity of breakdancing!
Keep breaking, keep freezing, and keep dancing! 🕺
Conclusion
In conclusion, freezes are captivating poses that define the art of breakdancing. They require skill, creativity, and physical fitness. By mastering freezes, dancers can elevate their performances and showcase their unique style. Whether you’re a beginner or an experienced dancer, freezes are an exciting aspect of breakdancing that you can explore and incorporate into your routines. So, next time you watch breakdancing, pay attention to the impressive freezes that add flair and excitement to the dance floor!
Leave a reply